
Hey everyone! Ken here with Ken's Kreations.
Sometimes you just need to have a stash of cards put away for those celebrations that sneak up on you. Recently, I noticed my stash category for "All Others" was getting low. Challenge accepted! So in today's post we are going to show you how to make a card that can be used for multiple occasions.

This card was actually super fun to make! Below I will give you the instructions, plus at the bottom of this post is all the supplies I used in making this card. If you use these links, Ken's Kreations gets a little commission that helps us bring more content to you! Thank you in advance for using my links at NO COST to you!
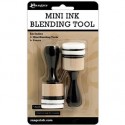
1) For the background of the card I used Tim Holtz Distress Ink and blended three colors using the Blending Tool. The more ink you blend, the more intense this will turn out. I also recommend using water color paper or Bristol Paper.
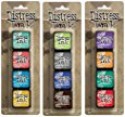
2) For the stars, I made my own stencil. I took the Fun Stampers Journey Star Punch and punched randomly on a spare piece of paper. I use this hand made stencil and layered this over the background.
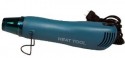
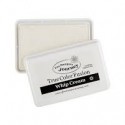
3) Now for the stars I used Fun Stampers Journey Whip Cream Ink. Now keep in mind this ink takes a while to dry. You can speed this process up by using a Heat Gun.
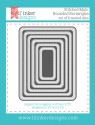
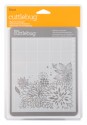
4) I finished the background by taking the Lil'Inker Designs Rounded Rectangle Die and running this with the background through the Cuttlebug machine.
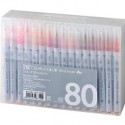
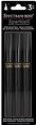
5) I stamped the mountains from the Fun Stampers Journey Climbing Mountains Set onto Bristol Paper and colored in the images with my favorite marker the Zigg Real Brush Marker Set.
6) Once the images were dried I used the Brother ScanNCut2 to cut out the images with NO offset.
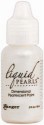
7) I wanted the snow caps to shine, so I used Liquid Pearl on them. I raised the mountains up from each other using Foam Squares.
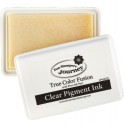
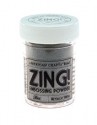
8) I found the perfect sentiment on the Star Bright Stamp Set. I stamped this onto the background with Clear Pigment Ink and covered it with Silver Embossing Powder. Once I tapped the excess embossing powder of the card I heat set it with my Heat Gun.
This was the perfect all occasion card and pretty easy to make. Not sure who will get this card, but it will come in handy some day!
Sometimes you just need to have a stash of cards put away for those celebrations that sneak up on you. Recently, I noticed my stash category for "All Others" was getting low. Challenge accepted! So in today's post we are going to show you how to make a card that can be used for multiple occasions.

This card was actually super fun to make! Below I will give you the instructions, plus at the bottom of this post is all the supplies I used in making this card. If you use these links, Ken's Kreations gets a little commission that helps us bring more content to you! Thank you in advance for using my links at NO COST to you!
1) For the background of the card I used Tim Holtz Distress Ink and blended three colors using the Blending Tool. The more ink you blend, the more intense this will turn out. I also recommend using water color paper or Bristol Paper.
2) For the stars, I made my own stencil. I took the Fun Stampers Journey Star Punch and punched randomly on a spare piece of paper. I use this hand made stencil and layered this over the background.
3) Now for the stars I used Fun Stampers Journey Whip Cream Ink. Now keep in mind this ink takes a while to dry. You can speed this process up by using a Heat Gun.
4) I finished the background by taking the Lil'Inker Designs Rounded Rectangle Die and running this with the background through the Cuttlebug machine.
5) I stamped the mountains from the Fun Stampers Journey Climbing Mountains Set onto Bristol Paper and colored in the images with my favorite marker the Zigg Real Brush Marker Set.
6) Once the images were dried I used the Brother ScanNCut2 to cut out the images with NO offset.
7) I wanted the snow caps to shine, so I used Liquid Pearl on them. I raised the mountains up from each other using Foam Squares.
8) I found the perfect sentiment on the Star Bright Stamp Set. I stamped this onto the background with Clear Pigment Ink and covered it with Silver Embossing Powder. Once I tapped the excess embossing powder of the card I heat set it with my Heat Gun.
This was the perfect all occasion card and pretty easy to make. Not sure who will get this card, but it will come in handy some day!
I have listed all of the supplies and files I used to make this card down below. Please use the links below to shop and by doing so you will be helping support Ken's Kreations!!
Remember caring is sharing and I would love for you to share this post.
PRODUCTS USED IN THE PROJECT:


Thanks for supporting Ken's Kreations. As an Amazon Associate, I earn from qualifying purchases.
No comments:
Post a Comment