
I have been very busy making some Beer Black Cats. For those who do not know my story, I lost my mom to cancer in 2004. I recall many good memories about my time with my mom. One that always will stay true to my heart is decorating for all of the holidays, which included making decorations. Well one of my fondest home made decoration is cats made out of beer bottles and light bulbs. I was always so excited to put these out. Well when my mom passed away, myself and my two brother all wanted the cats. I told them if i got them some day i would make a set for everyone. Well it has been 8 long years and I am finally emotionally ready to make this very special decoration, and I wanted to share them with all of you.
Here are the Directions to turn this:

Into This:

Materials Needed:
Red Hook Beer Bottle
Standard Light Bulb
Black Electrical Tape
Black Gloss Spray Paint
Black Felt
Orange Felt
Black Sequins
Black Sequins Strand
Black Stickles Glue
Orange Pipe Cleaners
Black Flower Embellishments
Black Bow Ties
Fishing Line
Small "X" Xyron Sticker Maker
Spray Adhesive
Zots
Hot Glue Gun
Latex Gloves (you will need these when working with spray glue)
*When working with spray glue make sure to change your gloves often, if you get the glue on your gloves and touch any other part of the cat it will leave a white mark on your black paint.
Latex Gloves (you will need these when working with spray glue)
*When working with spray glue make sure to change your gloves often, if you get the glue on your gloves and touch any other part of the cat it will leave a white mark on your black paint.
Step 1:
Take a Red Hook Beer bottle and peel the tag off using hot water. Glue the base of the lightbulb to the top of the Red Hook Beer Bottle. Using the Black Electrical tape, cover up the top of the beer bottle and the bottom of the light bulb


Step 2:
Spray the entire bottle and lightbulb using a glossy or semi-glossy black spray paint. Apply even coats and make sure not to get any drips. You want a nice even and shiny coat. Let Dry for at least 30 minutes.


Step 3:
Cut all the pieces out from the felt. Sadly I do not have any patterns for the felt. I did everything by the look of the bottle. I will give you measurements at the end of the post for all the items.

From the orange felt you will have to cut the following:
Boys Tux
Girls Dress
2 Chokers
4 Ears
4 Eyes
2 Noses
From the black felt you will have to cut the following:
4 Cat Heads
4 Cat Tails
4 Eyes
Step 4:
The first item we are going to work on is the boys tux. You will use the orange tux and outline the outer edge using black stickles glue. Once the glue has dried you will take you glue of choice and glue the black sequins down the middle of the tux. Let this dry completely. Using the same front piece the girls dress is the same thing, but instead of the black stickles glue you will use the black sequins strand. The trick here is to put the black sequin strand through your small "X" Xyron sticker maker. This will stick better to the felt and is an instant dry. Once dried, Spray the back of each of the felt pieces using a spray adhesive. Attach this piece on the bottom of the beer bottle.
BOY:


ADD PICTURE OF BOY ONLY FRONT PIECE ON THE BOTTLE
Girl:


INSERT PICTURE OF CLOSE UP GIRL FRONT AREA
Step 5
We are now going to get the neck choker on the cats. This is going to cover up the spot that the bottle and lightbulb are held together by the black electrical tape. I used my favorite glue adhesive spray and sprayed the back of the orange felt piece and stuck it around the neck of the cat. I let this dry for 10-15 minutes and then i used my small "X" Xyron sticker maker for the black rid-rak (for the boy) and the black sequin strand (for the girl). Then i used hot glue to attached the black bow tie onto the bow and the black flower onto the girl giving the look of a necklace. Once again let this dry for 10-15 minutes.


BOY RIC RAK

GIRL SEQUIN STRAND


Step 6:
We are going to make the cat's ears next. Now to make sure the cats ears stay up you have to cut two sets of black heads and glue them together. Once you have done this you will take the orange ears and glue them on each ear. Once this has dried, take 4-6 Zots and affix them to the bottom of the head and place them firmly on the back of the lightbulb center with the cats suit/dress.


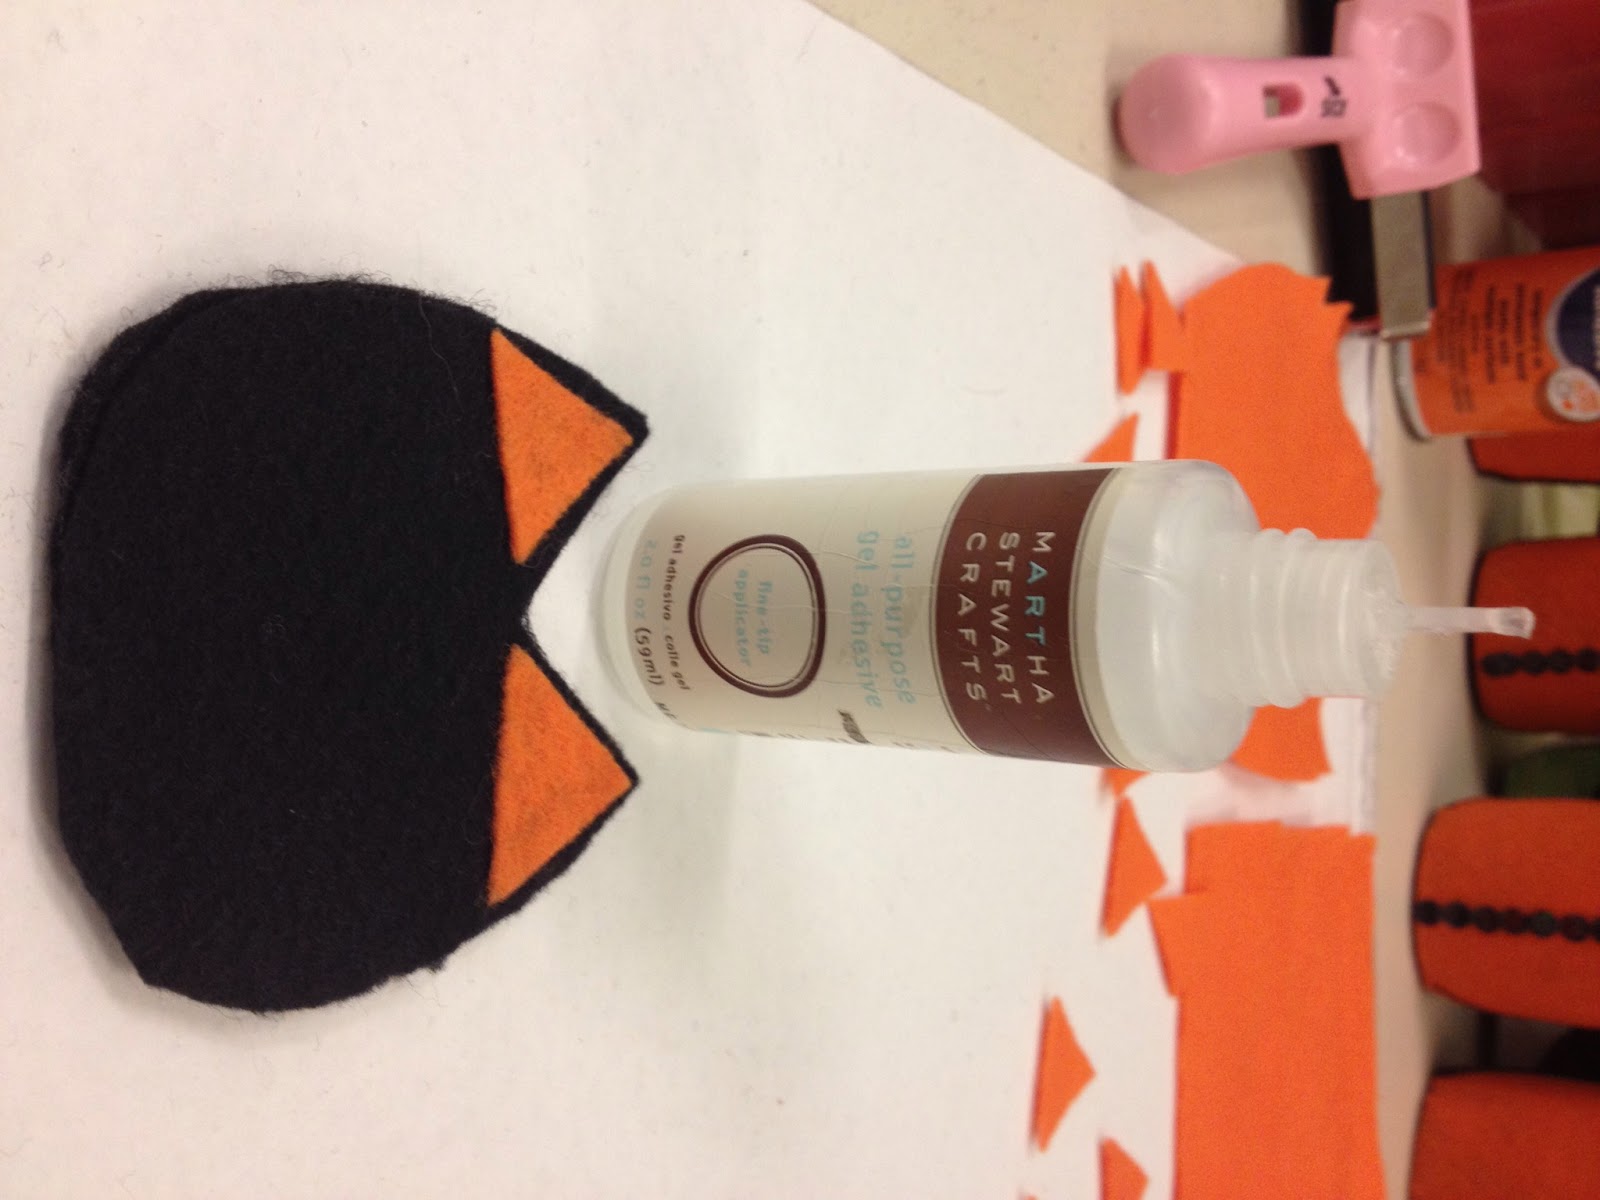


Step 7:
Next thing we are going to work on is the cat's eyes. In the first picture you can see how big the eyes are compared to the stickles glitter glue. I first cut these into long diamonds and then i rounded off the edges. Just glue the black eyeball onto the orange eye base. Once dried put the eyes slanted on the lightbulb lined up with the ears. The next part of this step is the nose. You need to cut a small triangle. After this you need to cut 3 long pieces of fishing line. Put a dot of hot glue on the back of the nose and then lie the 3 pieces randomly on the hot glue dot. Let dire for about 10 seconds and then affix it to the lightbulb right under the eyes. Trim the extra fishing line off to make shorter and more whisker like.


CATS UP TO THIS POINT

Step 8:
The final step is the cat's tail. You need to cut two tails for each cat to make the felt thicker. Once you have cut and glued the two tails together you will take an orange pipe cleaner. Double the pipe cleaner in half and twist it together. Make it in the shape of a Shepard hook. Spray it with the all purpose adhesive spray glue. Affix this to the tail and apply pressure for about 10 seconds. Once it is dry you will cut off the excess part of the tail. Affix 3-4 pieces of Zots and affix it to the back of the cat. Pull the tail out to give it the look of a curly tail.


Step 10:
Let Dry. Place decor in your house or give as gifts. Stand back, Look, Pat yourself on the back and smile. Why? Because your Beer Cats are DONE!

MEASUREMENTS OF FELT PIECES
Great project! Thank you for the tutorial. Great blog too!
ReplyDeleteMichelle
AKA Garden Gypsy on the CC MB
Ken...
ReplyDeleteWhat a great & unique halloween project. I love them!
What a wonderful tribute to your mom! As a cat person, I can't wait to make them. Thanks for the tutorial.
ReplyDeleteOutstanding project and great tribute to your Mom's memory!
ReplyDeleteok this project is super cute! Thank you for sharing this special craft project, I had to share it with my friends on facebook, hope that's ok! I will be pinning it too!
ReplyDeleteWhat a beautiful tribute to your Mom. Your Mom must be where you got the crafty gene from. These are adorable. I will have to try them. This is a great post.
ReplyDeleteColleen
Love it! Such a cute project.
ReplyDelete