Hey Everyone! Ken here with Ken's Kreations.
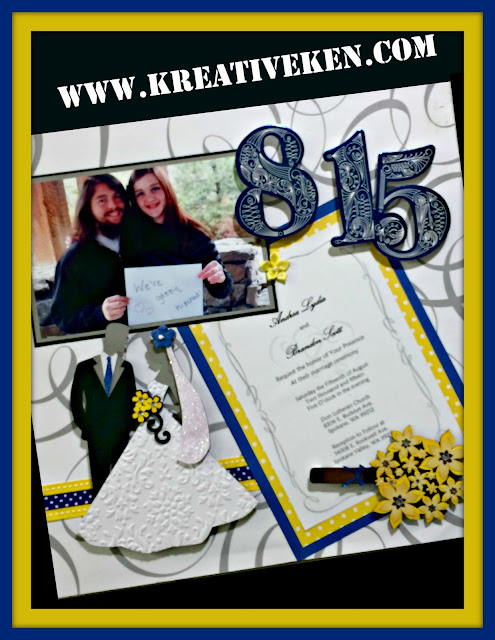
Well I am a proud uncle. My oldest niece recently got married to her high school sweetheart and I knew that I wanted to make more than just a card for this special occasion! So I wanted to make something to capture her memories of that special day. What a better way than using her invite that she sent me to build a shadow box frame using her wedding colors:
So this frame uses so many tools, cuts and elements that I just got lost in making it. To start with the project I used the Black Shadow Frame that can be found at Amazon or Joann's. I used wedding themed paper for the back ground and now I could start building my frame. I was able to visualize my project in Cricut Design Space using the Canvas Tool. Now I started by wrapping yellow and Blue Dot Ribbon around the base of the frame and secured it using my Scotch ATG Tape.
The bride and groom is form the discontinued Creative Memories Divine Wedding Cartridge. Once I had this cut out I ran the brides dress through my Cut'N'Boss using the Sizzix Damask Embossing Folder. The flowers were highlighted using Tim Holtz Mini Ink Pads using the Ranger Blending Tool. I highlighted the grooms tie with True Blue Stickles and the bride's vale with Diamond Stickles. I wanted the flowers on the bouquet to pop so I used the Imaginisce I-Rock Tool and using the Set Tool, I set three Adhesive Rocks in the bouquet. I raised the happy couple up using some Foam Tape.
Now onto my favorite part of the project. The wedding invite. Now off to the left of the invite I also inserted their engagement photo that they took to announce their engagement to the family. The flowers once again came from the Creative Memories Divine Wedding Cartridge. I used Tim Holtz Mini Ink Pads using the Ranger Blending Tool to highlight the flowers. Once again to make the flowers pop I used the Imaginisce I-Rock Tool and using the Set Tool, I set the Adhesive Rocks in the bouquet. Now the wedding date was 8-15-15, so I wanted to make sure to include this into the frame. I used Big Numbers From Heidi Swapp and using Blue Foil ran this through my Scotch Thermal Laminator. This is a way less expensive way of foiling then buying high prices machines. To check out how to use your laminatior for foiling CLICK HERE. I raised the bouquet and the numbers up using some Foam Tape.
Here is the finished product in the shadow frame hanging up on the wall. I hope it is a frame she will cherish for the rest of her life.
Make sure you do not miss out on any Ken's Kreations Post! Follow Me Here:
This post may contain affiliate links. If you purchase a product using the link I may receive a commission. I only participate in affiliate programs for products that I use or can recommend. Thanks for supporting Ken's Kreations


No comments:
Post a Comment