
Hey everyone! Ken here with Ken's Kreations!
If you are a fan of my blog, you know that my brother is a Star Wars FANATIC!! If you have missed some of these projects, just CLICK HERE to take a peek at those. Well, as you can imagine I am starting to run out of some ideas, but am always up for the challenge. This year I made some Star Wars SVG's to create some minimalist star wars frames, Let's take a peek on how to make these frames for the Star Wars Fan in your life:

For this project I made a total of 3 frames. Each one representing the original star wars trilogy (Episodes IV, V VI). I had a vision of minimalist frames with simple shapes and colors. I was able to make theses Star Wars SVG'S and make them available to all of my current Patreon's. These frames were actually very easy to make and were a huge hit. I will walk though the instructions below. Also make sure to check out all the supplies I used in this project at the bottom of the page. By shopping any of these links you help support Ken's Kreations!
All of the files were uploaded FOR FREE to Cricut Design Space and sized at 8X10. I knew I wanted to maintain the mat around the 11 X 14 Frame. This IS NOT a shadow box frame, however does give us some room for using foam squares in the project. All three designs were cut using the Cricut Explore Air 2 using the German Carbide Blade. I do use some mixed media in these frames, so I highly recommend Ken Oliver's Craft Mat to minimize any mess. I ended up purchasing these frames at Joann's, however found the frames HERE on Amazon. You will need a total of 3 of these. Lets look at each frame, what supplies you will need and how to assemble. Keep in mind these photos were taken with the glass in, so I apologize in advance for the glare.
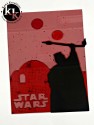
NEW HOPE FRAME:

1) I started by cutting the Star Wars SVG'S using Red Cricut Cardstock and Rose Cricut Cardstock. The Tusken Raider was cut out on Black Silver Adhesive Foil.
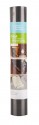
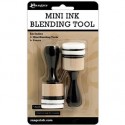
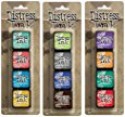
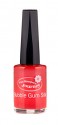
2) The Rose Cricut Cardstock will act as your background. To give this layer more texture use some Bubblegum Silk, Outrageous Pink Silk, Cranberry Silk and Silver Silk. If you have not used these before, take a peek at my video on how to use them by CLICKING HERE.
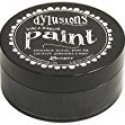
3) The next layer is the environment layer. For this specific movie I used Luke's family hut as the image to tie into A New Hope. To give this layer more texture use Bubble Stencil and sponge on Red and Black Delusion Paint. Let Dry.
4) Once dried raise this layer up from the background layer using Foam Tape.
5) The Tusken Raider will actually be adhered to the outside of the glass once you have finished the inside contents.
EMPIRE STRIKES BACK FRAME:

The same process used in the New Hope frame, will be used for this frame. The only exception is the colors we used in this frame.
1) I started by cutting the Star Wars SVG'S using Sea Foam Green Cricut Cardstock and Teal Green Cricut Cardstock. The Tauntaun was cut out on Teal Adhesive Foil.
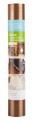
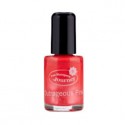
2) The Teal Green Cardstock will act as your background. To give this layer more texture use some Cool Pool Silk, Turbo Teal Silk, and Silver Silk. If you have not used these before, take a peek at my video on how to use them by CLICKING HERE.
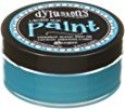
3) The next layer is the environment layer. For this specific movie I used opening battle as the image to tie into Empire Strikes Back. To give this layer more texture use Bubble Stencil and sponge on the Calypso Teal Paint. Let Dry.
4) Once dried raise this layer up from the background layer using Foam Tape.
5) The Tauntaun will actually be adhered to the outside of the glass once you have finished the inside contents.
RETURN OF THE JEDI FRAME:

The same process used in the New Hope frame, will be used for this frame. The only exception is the colors we used in this frame.
1) I started by cutting the Star Wars SVG'S using Dark Orange Cricut Cardstock and Yellow Cricut Cardstock. The Ewok was cut out on Copper Adhesive Foil.
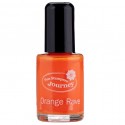
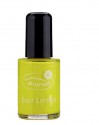
2) The Dark Orange Cricut Cardstock will act as your background. To give this layer more texture use some Sour Lemon Silk, Orange Rave Silk, and Bronze Silk. If you have not used these before, take a peek at my video on how to use them by CLICKING HERE.
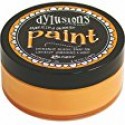
3) The next layer is the environment layer. For this specific movie I used opening battle as the image to tie into Empire Strikes Back. To give this layer more texture use Bubble Stencil and sponge on the Squeezed Orange Paint. Let Dry.
4) Once dried raise this layer up from the background layer using Foam Tape.
5) The Ewok will actually be adhered to the outside of the glass once you have finished the inside contents.
1) I started by cutting the Star Wars SVG'S using Dark Orange Cricut Cardstock and Yellow Cricut Cardstock. The Ewok was cut out on Copper Adhesive Foil.
2) The Dark Orange Cricut Cardstock will act as your background. To give this layer more texture use some Sour Lemon Silk, Orange Rave Silk, and Bronze Silk. If you have not used these before, take a peek at my video on how to use them by CLICKING HERE.
3) The next layer is the environment layer. For this specific movie I used opening battle as the image to tie into Empire Strikes Back. To give this layer more texture use Bubble Stencil and sponge on the Squeezed Orange Paint. Let Dry.
4) Once dried raise this layer up from the background layer using Foam Tape.
5) The Ewok will actually be adhered to the outside of the glass once you have finished the inside contents.
I have listed all of the supplies and files I used to make this card down below. Please use the links below to shop and by doing so you will be helping support Ken's Kreations!!
Remember caring is sharing and I would love for you to share this post.
PRODUCTS USED IN THE PROJECT:


Thanks for supporting Ken's Kreations . As an Amazon Associate, I earn from qualifying purchases.
No comments:
Post a Comment