
Hey Everyone! Ken here with Ken's Kreations.
I am so excited to bring you today's project, since this is the first time that I am incorporating sewing into my project. I LOVE the look of actual real thread in different stitches on cards. I know many people are using Metal Stitched Dies to achieve this look, however I wanted the real thing. Only Problem is.....I DO NOT know how to sew. That did not stop me from attempting, so for this card we are stating the sewing job is suppose to look off kilter, we are calling it abstract. So lets show you today's project, the steps and your shopping list down below!

I am so excited to bring you today's project, since this is the first time that I am incorporating sewing into my project. I LOVE the look of actual real thread in different stitches on cards. I know many people are using Metal Stitched Dies to achieve this look, however I wanted the real thing. Only Problem is.....I DO NOT know how to sew. That did not stop me from attempting, so for this card we are stating the sewing job is suppose to look off kilter, we are calling it abstract. So lets show you today's project, the steps and your shopping list down below!

Now I have wanted to sew on my cards for a very long time. In fact I originally bought my Brother Sewing Machine for this exact purpose. The Brother Sewing Machine was just too bulky for me, so recently I purchased the Janome Graceful Sewing Machine. This is a lightweight, compact and simple sewing machine that comes in 11 different colors. I have been able to play around a little with this machine and it is pretty simple to use. Here is the first card I made with it and the instructions. Also, please shop from any of the links in this post or from the shopping list down below. By clicking on these you help support Ken's Kreations.
1) Take a piece of Whip Cream Cardstock and cut it to 4.25X5.5 and another piece at 3X3. Run this through your Cuttlebug using the Magnetic Cutting Plate and the Pierced Circle Die Set. I just placed the Pierced Circle Die Set in random spots.
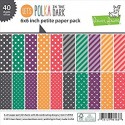
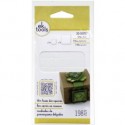
2) Using the Let's Polka Paper Pad punch out 8 Hearts In Different Colors with the Fun Stampers Journey Punch System.
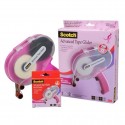
3) Using your Scotch ATG, place a small amount in the center of the back of each heart. This will temporarily hold the hearts so you can sew them to the card stock.
4) I chose to use the zig-zag pattern on the Janome Graceful Sewing Machine. I ran the hearts that were adhered to the card through the machine to form three vertical lines right through the center of each heart. These now can be placed on a 3.5X3.5 square of Black Cardstock.
5) I wanted a straight line around the border of the black frame, however my straight line took a more abstract look. So that is what we are going with. Nothing a little practice cannot fix.
6) I raised this entire layer up from the base of the card ( with the pierced circles on it) with some Foam Tape. Each heart's side is also raised up using Small Foam Squares.
7) The sentiment comes from the Fun Stampers Journey Text Happy Set. If you are not aware of what Fun Stampers Journey is than CLICK HERE. Now that we have the sentiment picked out we need to create a frame for it. I once again used the Fun Stampers Journey Punch System. I punch a 1.75 Oval out on Black Cardstock and a 1.5 Inch Oval out on Whip Cream Cardstock
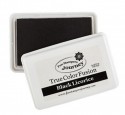
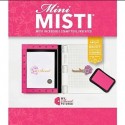
8) Using the Mini MISTI line up your sentiment with the 1.5 Inch Oval and stamp using Black Ink

That is all for this card. I just love the simplicity of the card and the message. Plus this card can be used for so many different occasions. You can even shake it up by using a different shape in the place of the hearts.
I have listed all of the supplies and files I used to make this card down below. Please use the links below to shop and by doing so you will be helping support Ken's Kreations!!
Remember caring is sharing and I would love for you to share this post.
PRODUCTS USED IN THE PROJECT:
Thanks for supporting Ken's Kreations . As an Amazon Associate, I earn from qualifying purchases.


No comments:
Post a Comment